编译pve内核

参考自PVE用LXC几乎完美运行openwrt更新无需编译内核支持fullconenat-软路由,x86系统,openwrt(x86),Router OS 等-恩山无线论坛 - Powered by Discuz! (right.com.cn)

参考自proxmox折腾 篇一:解决j3455直通iommu分组问题,PVE内核编译教程_服务软件_什么值得买 (smzdm.com)

0.前言

目前pve最新内核为6.2.11-1,并且j3455的iommu分组有问题,想自己编译内核解决一下。

1.环境

debian 11虚拟机,CPU2核,内存4G,硬盘150G,编译完实际使用空间为32G。准备一个非root的账户。

2.步骤

2.1配置软件源

更换成清华软件源

1
$ sudo nano /etc/apt/sources.list
1
2
3
4
5
6
7
8
deb https://mirrors.tuna.tsinghua.edu.cn/debian/ bullseye main contrib non-free
# deb-src https://mirrors.tuna.tsinghua.edu.cn/debian/ bullseye main contrib non-free
deb https://mirrors.tuna.tsinghua.edu.cn/debian/ bullseye-updates main contrib non-free
# deb-src https://mirrors.tuna.tsinghua.edu.cn/debian/ bullseye-updates main contrib non-free
deb https://mirrors.tuna.tsinghua.edu.cn/debian/ bullseye-backports main contrib non-free
# deb-src https://mirrors.tuna.tsinghua.edu.cn/debian/ bullseye-backports main contrib non-free
deb https://mirrors.tuna.tsinghua.edu.cn/debian-security bullseye-security main contrib non-free
# deb-src https://mirrors.tuna.tsinghua.edu.cn/debian-security bullseye-security main contrib non-free

添加pve软件源,因为debian的源里面不包含libpve-common-perl

1
$ echo "deb https://mirrors.tuna.tsinghua.edu.cn/proxmox/debian/pve bullseye pve-no-subscription" >> /etc/apt/sources.list

更新软件

1
$ sudo apt update

此时会报错

GPG error: The following signatures couldn't be verified because the public key is not available

解决方法

1
$ sudo gpg --keyserver keyserver.ubuntu.com --recv xxx

xxx替换为刚刚报错中的一串随机数

1
$ sudo gpg --export --armor xxx | sudo apt-key add -

同样,把xxx替换为刚刚报错中的一串随机数

再次更新

1
$ sudo apt update

2.2安装编译依赖

1
$ sudo apt install devscripts asciidoc-base automake bc bison cpio dh-python flex git kmod libdw-dev libelf-dev libiberty-dev libnuma-dev libpve-common-perl libslang2-dev libssl-dev libtool lintian lz4 perl-modules python2-minimal rsync sed sphinx-common tar xmlto zlib1g-dev dwarves

2.3下载pve内核源码

1
2
$ git clone git://git.proxmox.com/git/pve-kernel.git
$ cd pve-kernel

2.4(可选)为j3455出现的IOMMU分组不正确打补丁

参考自proxmox折腾 篇一:解决j3455直通iommu分组问题,PVE内核编译教程_服务软件_什么值得买 (smzdm.com)

1
$ vim ./patches/kernel/0004-pci-Enable-overrides-for-missing-ACS-capabilities-4..patch

在vim命令界面下输入

/+194

@@ -194,6 +194,106 @@ static int __init pci_apply_final_quirks(void)

改成

@@ -194,6 +194,105 @@ static int __init pci_apply_final_quirks(void)

即把106改成105,然后在vim命令界面下输入

pci_is_pcie

+        if (!pci_is_pcie(dev) ||
+                pci_find_ext_capability(dev, PCI_EXT_CAP_ID_ACS))

改为

+        if (!pci_is_pcie(dev))

记得删除第二行的时候,在第一行的最后加一个右括号

2.5开始编译

1
$ make

时间

3.编译完成后

得到以下文件

  • linux-tools-6.2_6.2.11-1_amd64.deb
  • linux-tools-6.2-dbgsym_6.2.11-1_amd64.deb
  • pve-headers-6.2.11-1-pve_6.2.11-1_amd64.deb
  • pve-kernel-6.2.11-1-pve_6.2.11-1_amd64.deb
  • pve-kernel-libc-dev_6.2.11-1_amd64.deb

复制到pve中,安装后重启。

4.切换内核

参考自佛西博客 - Proxmox VE 内核kernel (buduanwang.vip)

4.1查看目前内核

1
$ proxmox-boot-tool kernel list

出现了已安装的内核,但还用的是旧的内核

Manually selected kernels:		--->手动加入的内核,通常是自己编译的内核
None.

Automatically selected kernels:	--->自动读取到的内核
5.15.107-1-pve
5.15.39-3-pve
6.2.11-1-pve

Pinned kernel:					--->当前设置默认启动的内核
5.15.39-3-pve

4.2切换内核

1
$ proxmox-boot-tool kernel pin 6.2.11-1-pve

如果只是想临时启动,可以添加一个参数--next-boot ,这样将在下一次启动的时候启动这个内核,但是之后还是默认的启动内核。

1
$ proxmox-boot-tool kernel pin 6.2.11-1-pve --next-boot

4.3验证切换结果

1
$ proxmox-boot-tool kernel list
Manually selected kernels:
None.

Automatically selected kernels:
5.15.107-1-pve
6.2.11-1-pve

Pinned kernel:
6.2.11-1-pve					--->已切换为新的内核
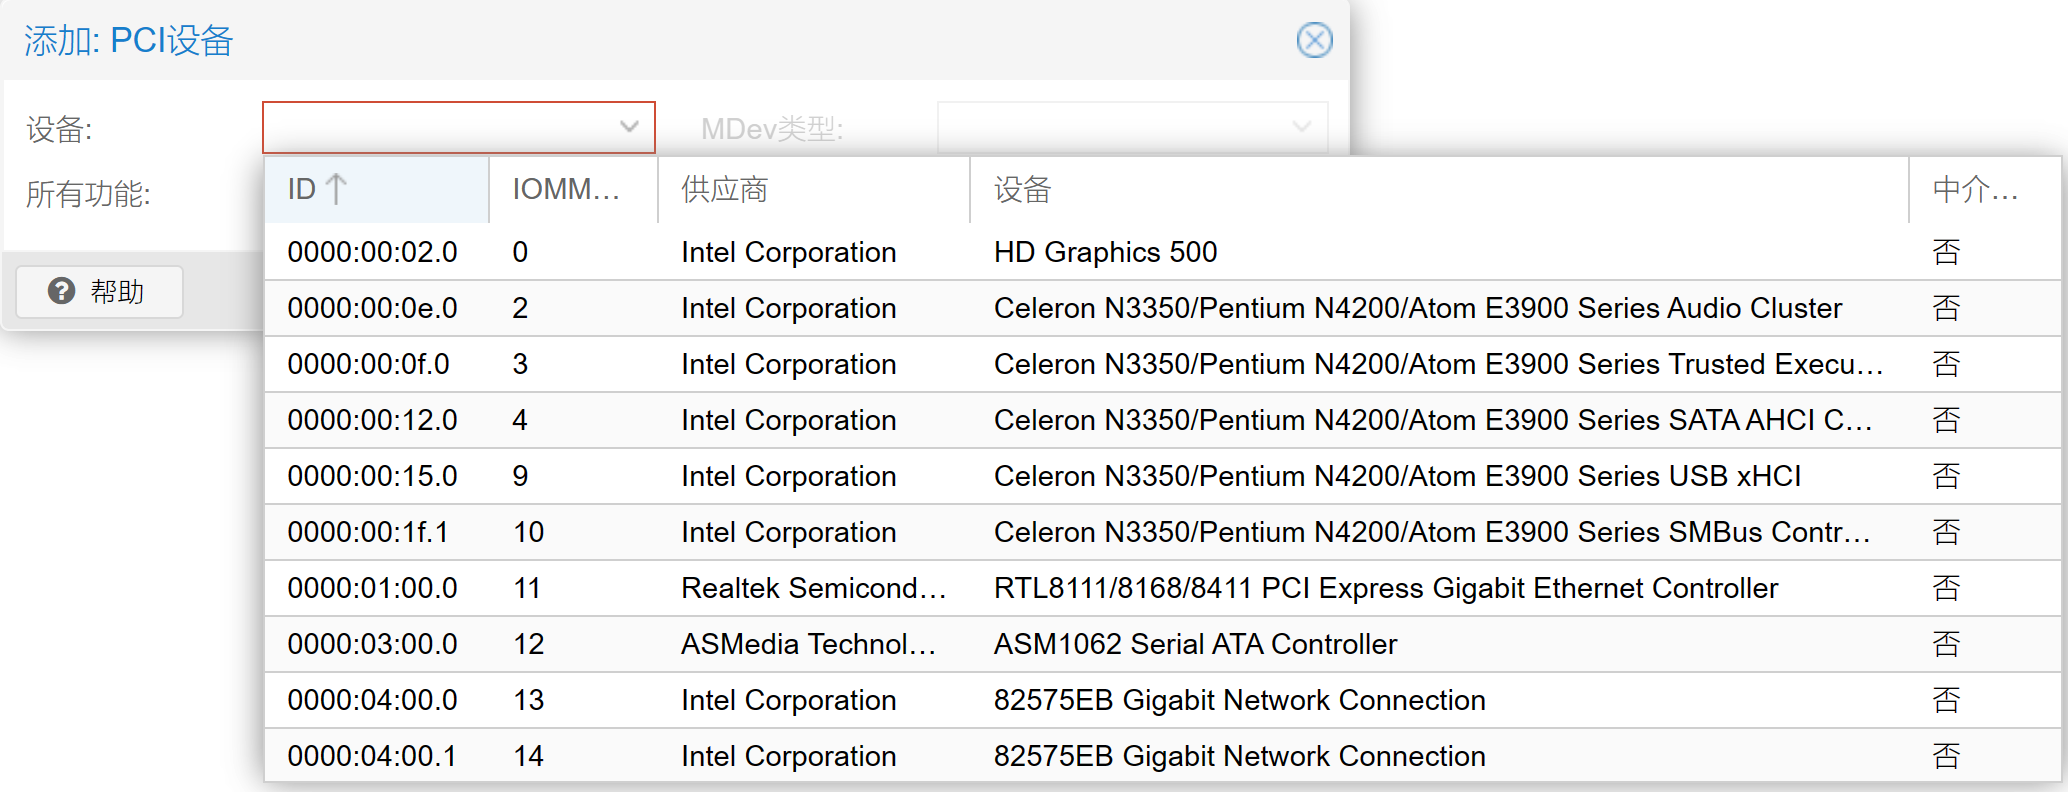
IOMMU分组正常。

image-20230512132029544

5.补充

卸载内核命令

1
$ dpkg --remove pve-kernel-5.15.39-3-pve

卸载并清除内核命令

1
$ dpkg --purge pve-kernel-5.15.39-3-pve
updatedupdated2023-09-162023-09-16